First of all, start drawing the primary shape in which later on you will draw the shoes.Do not use black pencils because you will need the surface as clean as possible for the shading part.
Do not forget that if you construct something in line, you will need double the time to shade it.
After drawing the big volume, try to underline the areas that will be covered with different grays: light or dark grays, highlights or deep shadows.
If you think you will use your eraser to erase some parts of your drawing in order to add the light, well, you will see how wrong this is.
When tracing the areas that you will have to shade, think from the beginning of the parts where the light will be placed and just leave those parts empty. Just leave it white as the paper background.
If you need to erase something, do it with an eraser in shape of a pencil. This kind of tool will help you be precise and sharp.
Regarding the pencil,when this one becomes to be short, use a dry marker that you want to throw away and simply stick your small pencil into the plastic part of your marker. This will allow you to use the pencil until it gets very very small.
If you draw a lot, you will see that sometimes it happen to consume one-two pencils, especially if they are very greasy, meaning 6 to 8B.
Another tip I could give you is to start drawing and especially shading from left to right, because like this, you won't leave any traces on the white paper.
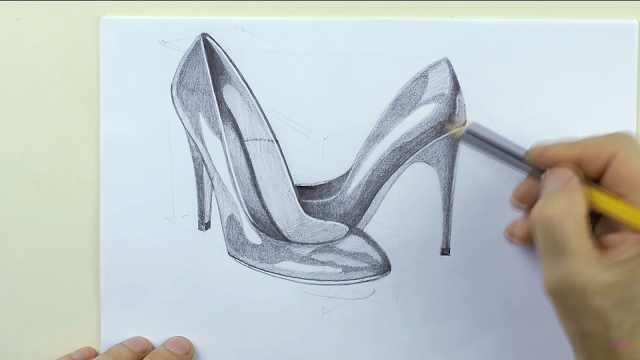
When studying, keep in mind the aspect of each texture. This time, the plastic surface will have a lot of reflexes, lights and shadows, one next to the other.
The passing between light and shadow could be very sharp so get used to it.
The second shoe is darker than the first one, because there is the shadow that makes that possible.
At the end, be bold and underline some parts that are in shadow. This ensures a nice contrast and makes the drawing look tridimensional.
Follow Fashion teaching:https://www.youtube.com/user/FashionTeaching/videos